

There’s so much packed into the HubSpot platform that it can be difficult to know where to start or you might even miss out on some of the most useful features.
One of the things we often see clients using HubSpot overlook is the out-of-the-box Lifecycle stages property that can be set at both a contact and company level. When used correctly, they can help you to pinpoint a customer’s current position in your marketing & sales cycle for better segmentation and nurturing.
Plus, they can help you to better understand how leads are being handed off between marketing and sales – we’re all about that smarketing collaboration!
So if you’re not sure if you’re using them in the best way or you’d like to get started, we’ve got a quick overview to help you make sure you’re getting the most out of them!
- HubSpot Lifecycle stages definitions
- Why use HubSpot Lifecycle stages
- How to automate/set up HubSpot Lifecycle stages
- Using Lead Status alongside HubSpot Lifecycle stages
What do HubSpot Lifecycle stages mean
In HubSpot, the Lifecycle stage is a property that is automatically assigned to contacts in your database depending on how they’ve come to be there – i.e. at what stage in the lifecycle funnel they are at when they’ve entered into your CRM.
They then allow you to track contacts or companies as they move through your funnel (ideally moving forward!). Generally speaking, new leads aren’t ready to buy when they first convert on your website, so using Lifecycle stages allows you to recognise where they are and deliver more targeted nurturing to help move them along to the next stage.
There are 8 pre-set Lifecycle stages in HubSpot that cannot be edited.
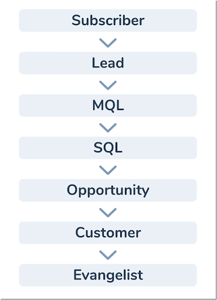
In sequential order, they can be roughly described as follows:
- Subscriber: a contact who has opted in to hear more from you by signing up for your blog or newsletter. Whenever a contact is manually created, comes via the Sales integration or converts on a blog subscription form, this is the stage that is automatically tagged.
- Lead: a contact or company who has converted on your website beyond the initial subscription stage; i.e on a lead generation form or when a contact is synced to HubSpot from Salesforce.
Marketing Qualified Lead: a contact or company that your marketing team has qualified as ready for the sales team to reach out to. - Sales Qualified Lead: a contact or company that your sales team has qualified as a potential customer.
- Opportunity: a contact or company who is associated with a deal in your portal. (If you've selected Sync lifecycle stages in your settings, this is automatically set by HubSpot when a contact or company is associated with an open deal.)
- Customer: a contact or company with at least one closed deal. (Again, this can be automated if you've selected Sync lifecycle stages in your settings)
- Evangelist: a customer who has specifically advocated for your organisation, i.e. someone you would go to for a positive recommendation.
- Other: a contact or company who does not fit any of the above stages, i.e. a supplier or employee.
Why use HubSpot Lifecycle stages
We’re all about sending people the information they need, at the right time – this is the fundamental theory of inbound marketing, after all.
Whilst many businesses are well aware of what Lifecycle stages are and how they work, we think there’s a lot more that can be done to actually bake them into your strategy, processes and reporting.
Typically, many organisations tend to focus a lot on the later stages of the customer lifecycle – how many opportunities there are, moving into sales. Which we totally get! But it doesn’t give you the whole picture and it’s a very sales-driven approach.
For a top-level overview, here’s what Lifecycle stages enable you to do when used properly:
- Allows everyone on your team to see where a specific contact is in your sales or marketing process
- Helps your team better understand when to make the handoff between marketing and sales
- Optimise processes and your use of HubSpot’s software. It’s a central function of HubSpot and not using them properly might mean you need workarounds and fixes later
- Collects insights to improve your sales process
- Helps you understand your sales cycle
- Identifies bottlenecks
- Guides future decision-making
Allows you to target your contacts with the right message at the right time
By fully understanding and tagging your database with the earlier stages like subscriber, lead, MQL and SQL, you’ll be able to drive more momentum into your flywheel and make better use of your existing contacts. You’ll see exactly where most of your contacts currently are, potentially helping you better allocate resources to specific pots.
It’s much easier to sell to someone that already knows your brand; so by properly using Lifecycle stages, you’ll be able to see exactly where people are interacting and engaging with your content earlier on in the funnel, with the aim to further nurture them into SQLs and Opportunities.
Lifecycle stages enable you to tailor and segment your content to match whichever lifecycle stage your contacts are in, sharing more relevant and timely offers that are much more likely to convert.
How to automate/set up HubSpot Lifecycle stages
By default, the Lifecycle stage for a new contact or company will be set depending on how they were created. You can manually update this or you can set up bespoke automation to put contacts into specific pots based on your own criteria or triggers.
Below are the ways you can update a Lifecycle stage:
- Manually update the Lifecycle stage property for an individual contact or company.
- Bulk updates the lifecycle stage of your contacts or companies from an index page.
- Import a Lifecycle stage column to update the Lifecycle stage property for a list of contacts or companies.
- Set up automatic syncing of lifecycle stages between contact, company, and deal records.
- Use the Set [contact/company] property value action in a chat flow or the Set a property value action in a workflow (Professional or Enterprise accounts only).
- Use a hidden form field (Marketing Hub Professional or Enterprise only).
- Set the lifecycle stage within certain integrated apps that sync the Lifecycle stage property, such as the HubSpot-Salesforce integration.
You can see the source of an update in the Lifecycle stage property history.
To automate the process so that contacts automatically get assigned to specific stages, you can build out workflows that work in tandem with lead scoring.
Once you have a clear understanding and definition of what each lifecycle stage is, you can set up triggers that put contacts into specific pots, for example, if you have very high intent, BOFU form, these will always be tagged as a marketing-qualified lead. Or once a specific owner picks up a contact, they then become a sales-qualified lead. The options here are endless!
Using Lead Status alongside HubSpot Lifecycle stages
So there is a distinct difference between HubSpot’s Lead Status and Lifecycle Stage properties that you need to be aware of, which can also massively improve the way you view and analyse your database. When used together, they’re super powerful!
Lifecycle Stage = the big picture of each step the contact takes until they close
Lead Status = the smaller steps in between that document the lead’s journey through the funnel
Again, HubSpot offers some default lead statuses to get you going but the good news is, these are completely customisable so that you can build out a specific process that works for your business.
HubSpot lead statuses include:
- New
- Open
- In Progress
- Open Deal
- Unqualified
- Attempted to Contact
- Connected
- Bad Timing
Here at Fuelius, we’ve customised and evolved our lead statuses to match every stage of the lifecycle, with detailed steps within each pot so that both our sales and marketing teams can precisely understand where a lead currently is in their journey with us.
For example, when contact is at the Sales Qualified Lead stage, we use Lead Statuses like ‘Not right time’, ‘Bad fit’, ‘Needs more data’ to help us identify what the next logical step should be for them as well as what types of content to send them.
To build out your own Lead Statuses, we recommend reviewing your existing data and customer journey and carrying out an audit of what each stage looks like to your business so that you can create hyper-relevant and targeted definitions.
As a result, you’ll empower your whole team to better utilise and navigate your database, with enhanced tracking and reporting.
Useful HubSpot articles:
Knowledge Base: How to use Lifecycle Stages
Knowledge Base: Managing Lifecycle Stages Sync Between Objects
Header image source: Envato Elements